How to Prepare Your Kitchen for Painting
Professional painting will brighten your kitchen and boost your mood. But before you start, ensure the room is ready for painting.
Start by emptying the cabinets and thoroughly cleaning all surfaces to remove grease and mildew. Then, tape a tarp over worktops and appliances and lay down plastic sheets to protect your floor.
The walls of a kitchen are prone to moisture, grease, and smoke that can leave their mark on your wall decor. Preparing the wall before painting is important to prevent future damage properly. That can be done by washing the surfaces and scrubbing any mildew or grease build-up. Use a degreaser to get the job done quickly and thoroughly. Once the walls are clean and dry, they can be painted.
There are many ways to style the walls of your kitchen. You can hang framed artwork and landscape paintings to add color to the room. You can also create a gallery wall to display your favorite prints or go for a more modern look with wallpaper. Some prefer to add a splash of drama with a feature wall of exposed brick or reclaimed timber. Whatever your choice, make sure the colors and materials complement the rest of the room.
Choosing the right paint color for your kitchen is crucial. Selecting a color that is easy to clean and will resist moisture is recommended. It is also important to use quality paint, as it will be much more durable than a cheaper option. When buying paint, read the label carefully to ensure you get an oil-based or latex product. You should also avoid mixing latex and oil-based stains as it can cause the surface to peel.
The best way to style your kitchen walls is to hang art pieces or photographs. That will help to personalize the space and make it more inviting. You can also hang functional items like a chalkboard for grocery lists and meal planning or decorative shelves for plants, dishes, and cookbooks. There are endless possibilities for decorating your kitchen walls, so find what works best for you and your family.
For cabinets, the main objective is to create a durable surface that will hold up well and be used daily. That requires a thorough cleaning, sanding, and priming before you get to the painting phase. It’s also important to ensure the cabinets are free of dents, scratches, and other blemishes. Use Bondo wood filler for any damaged areas or cracks. Consider painting your cabinets with high-quality cabinet enamel paint, which is specially formulated for kitchen cabinets and designed to hold up well to wear and tear.
If you are planning to repaint your existing cabinets, use a foam sanding block and light sand the surfaces of the cabinets and drawer fronts to scuff them up lightly. That will give the new primer something to adhere to and help ensure a smooth, even finish once ready to apply your finish coats. Make sure you use a tack cloth to remove all the sanding dust, as small particles left behind can waft into your paint and ruin the pristine finish you’re trying to achieve.
It’s also important to decide if you will use water or oil-based paint for your cabinets. Oil-based paints have a strong odor and can be difficult to clean up, while water-based paints dry quickly and don’t have a strong smell. If you need to know what type of paint was used previously on your cabinets, dip a cotton swab into denatured alcohol and rub it in an inconspicuous area to see if any remnants come off.
When painting your cabinets, starting with the face frames and working down to the doors and drawer fronts is a good idea. That will help you avoid drips and runs in more critical areas. Using a roller on the face frames and a brush on the doors and drawer fronts is also a good idea, as this will help you achieve a smoother finish.
Applying two to three coats of paint is also a good idea. That will help your cabinets stand up to the wear and tear of everyday use, as well as provide a more vibrant color.
Shelves, especially those with wide expanses of open wood, are prone to showing wear and tear from daily use as dishes and glasses come in and out. Over time, they can become shabby, and the paint can chip. If you’ve recently painted the cabinets, it’s probably a good idea to repaint shelves to keep them fresh.
Start by removing the cabinet doors and all hardware (knobs and handles). Mask off the areas you don’t want to paint with painter’s tape, then remove the shelving from the cabinets and lay them on a flat surface like your floor or a work table. Cover the surrounding area with a drop cloth to protect it from drips and spills. If the shelves aren’t already sanded, lightly smooth them. Wipe away any dust from grinding and then prime the shelf surfaces. Allow the primer to dry and then sand again, just as you would with the cabinet doors, then wipe clean of any dust. Now, you’re ready to apply the finish. For speed, use a roller, but be sure to back-brush any rolled areas to avoid brushstrokes. If you find the task of painting shelves daunting, consider using a paint sprayer—these tools are easy to use and give a consistent, even coat.
If your shelves are wood, you can choose between a natural look with an accurate finish or a more dramatic effect by staining them. If the shelves are painted, choose a color that coordinates with the walls and cabinets for a cohesive look. Darker colors are popular because they create an expansive feeling in tight spaces.
Don’t limit yourself to storing cookware and dinnerware on your shelves; you can also display artwork, greenery, and a few objet d’art pieces. Displaying framed prints in kitchen-themed patterns is a great way to add character to any room, while pretty tins and glass jars can be used as utensil holders or bud vases. Adding corner shelves is an effective solution for tight areas and allows you to use the space for storage and display.
Trim is the woodwork around a room’s doors, windows, baseboards, and other architectural features. It’s a big design element that can help pull a room together if painted the same color as the walls. Paint can also cover scuff marks or dings in the trim. Before you paint, sand the trim with 120-grit sandpaper and wipe it down with a damp cloth to remove any dust or residue.
It’s a good idea to prime your trim before painting, especially if you are going from dark to light paint or if the surface has been stained. A primer will help the topcoat of the paint adhere to the surface.
A good way to test out a color before you start painting trim is to paint a large square of the new shade on the wall. That will give you a good sense of how the color will look in your space, and you’ll be able to spot any spots where you need to do additional sanding or scraping and any areas where the wood needs repair.
If you have glossy trim, it’s important to dull the surface so that new paint can adhere properly. You can sand the surface with 120-grit sandpaper or apply a brush-on, which will work on oil or latex paints. Be sure to vacuum up the sanding dust before starting to paint.
Low suggests picking one level above what’s on the walls when choosing a paint finish for the trim. For example, a wall coated in flat paint would look best with a satin or semi-gloss trim.
Use brushes with flagged tips and tapered edges to get the best results from your trim painting. Small, angled-tipped meetings are ideal for molding, doorframes, and baseboards; larger brushes can be used for wainscoting or paneling. If you are using water-based paints, choose synthetic brushes; natural bristles tend to swell when wet and can leave noticeable brush strokes.
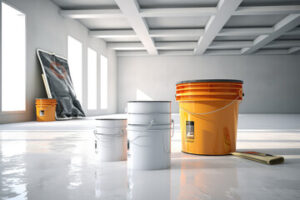
Having the right tools and supplies will make your project go more smoothly, so invest in quality painter’s tape, plastic sheeting, and good-quality brushes designed for the type of paint you’re using. It would be best to consider purchasing a tack cloth to keep the area clean as you work.